
Curved Piecing
DISCLOSURE: THIS POST MAY CONTAIN AFFILIATE LINKS, MEANING I GET A COMMISSION IF YOU DECIDE TO MAKE A PURCHASE THROUGH MY LINKS, AT NO COST TO YOU. PLEASE READ MY TERMS OF USE POLICY FOR MORE INFO.

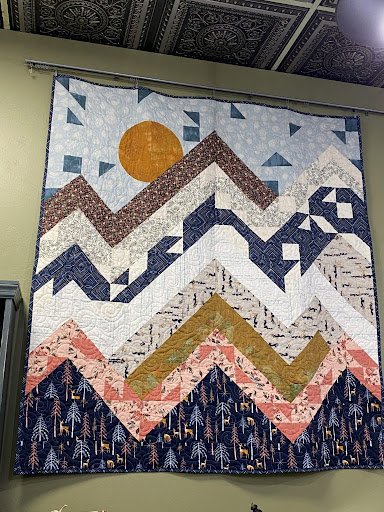
Pattern: Wilderness by AGF (Click here for your FREE pattern) Fabric: Little Forester
Fate. First, the fabric collection, Little Forester, showed up on my Pinterest feed. Pinned.
Then Wilderness showed up as a free pattern on AGF’s newsletter. Saved.
Next, the quilt store asked if I would make a sample for display. Not one to ignore signs, I agreed to piece the quilt.
As I read through the pattern, the adrenaline that can only originate from the prospect of a new project started to flow. Up until I flipped the page to see templates (gag). But it got worse. Curved piecing (slight vomit).
My immediate reaction was “How can I get away from doing the curved piecing?” Remove the sun totally? Applique? But both solutions would require a redesign of the quilt to work into the Half Square Triangles (HST). In the end I had to give myself the pep talk.
“There’s no reason you cannot do the curved pieces.”
“Learning new techniques is how you grow.”
“Get your shit together.”
And so I did curved piecing in a quilt for the first time. And guess what? I DIDN’T DIE.
Now most quilters taking on a new technique would probably start by getting on Youtube and watching some tutorials about curved piecing. Not me. I just assumed I could figure it out and went for it. Watching the tutorials would have been a better decision.
Some quilts, like Wilderness, provide paper templates to cut out and use. Other quilts required plastic templates that can be used on many different projects. After I did a subpar job with the paper templates I experimented with the plastic.
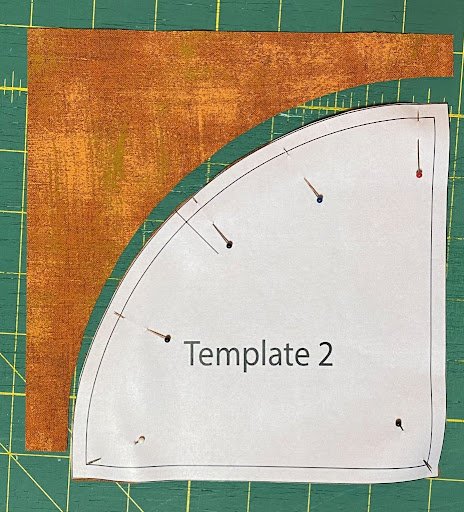
After I cut my templates I marked my centers to ensure my pieces lined up. Despite being told I did not need to pin at this step, I did. My instincts said to pin. My instincts were wrong. I tried the No Pin Method later and found no pins was much easier! (LEARN FROM ME)
No Pin Method
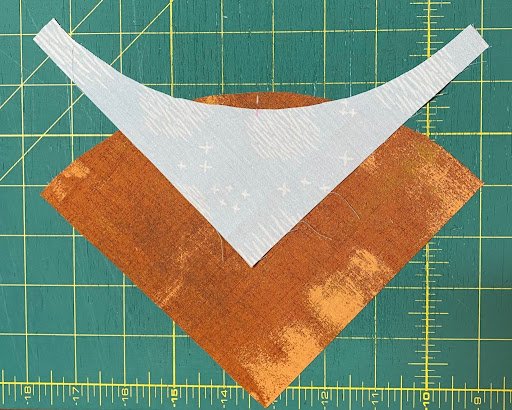
Starting at the top, I matched the edges and slowly worked down the curve, pulling the top piece even with the bottom as I went. Still important to make sure centers match up. The way the pieces came together was awkward and defied science but they did.
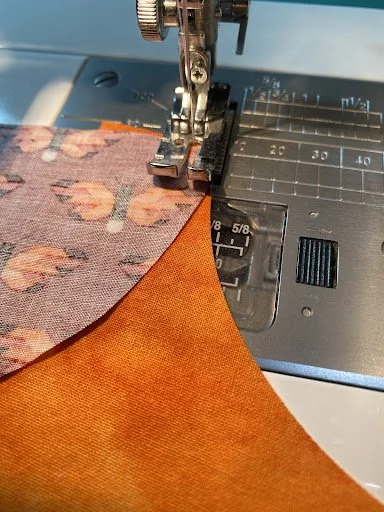
As it turns out, keeping a consistent ¼” seam allowance was difficult while sewing around a curve! TIP: Before you sew, use a small ruler to mark ¼” from the edge all the around the curve for your seam line. Use the marked line as a guide while you sew your pieces together. GO SLOW! You are working with two pieces that are not laying perfectly flat together. Take your time!
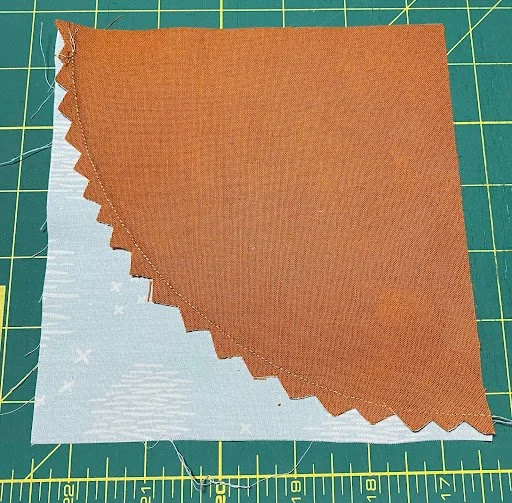
Trimming
Again, my instincts wanted to trim the curved seams. I was later told trimming is not necessary. The non-trimmed seams ended up laying out very nicely. In the future I would probably not trim.

My blocks went together to create a circle, so I alternated between pressing towards my circle and towards my background. This helped when matching seams to create a seamless circle.
Plastic Templates
I experimented with using plastic templates for curved piecing to compare with the paper templates. I used Elisa’s Backporch 3 ½” Finished Block Template (Click here for template).
Tips:
Use a small 18mm rotary cutter.
When cutting with templates make sure you keep the rotary cutter at a 90-degree angle to the mat to ensure an accurate cut.
Hold template in place while cutting around.
The plastic templates are life changing! You get a much cleaner cut using the rotary cutter and less chance of distorting the shape.
Guys, I don’t want to brag or anything, but I did three blocks of curved piecing. My first attempt DID NOT come out perfect. I did not cut my templates accurately enough which caused the background piece to not fit perfectly to the circle piece. Also, my seam allowance was not pre-marked and I went over ¼” when sewing the pieces together so my blocks came out smaller than they should have. As they say….
Better done than perfect
My blocks did not come out perfect and yes, I could have started over and they probably would have been better the second time. I, however, get easily frustrated and choose to make the best of my imperfections and move forward. Tomorrow is another day to master curved piecing. The most important thing is I no longer have a fear of the technique and am willing to try again!
There she is, folks.