
Quilting in Tiny Spaces
DISCLOSURE: THIS POST MAY CONTAIN AFFILIATE LINKS, MEANING I GET A COMMISSION IF YOU DECIDE TO MAKE A PURCHASE THROUGH MY LINKS, AT NO COST TO YOU. PLEASE READ MY TERMS OF USE POLICY FOR MORE INFO.
My daydream looks something like this - 300 square feet of open bright space. Tall ceilings to hang finished quilts, one wall of floor to ceiling cupboards, one wall with nothing but a design board, a huge cutting table in the center, room for a long arm plus a long table so other quilters could join me on occasion. Climbing steps and beds throughout for all my kittens. But unfortunately for me, that’s just the dream.
The reality for most of us is that we do not have the square footage in our homes to have elaborate craft spaces. If we have a corner of the guest bedroom we are lucky. Currently, my husband and I are living in 500 square feet and sleeping in a loft that we cannot stand up in. Needless to say, we do not have space for my sewing gear. My brilliant husband never disappoints, however, and reclaimed a shed into a little sewing studio for me (I refuse to call it a She-Shed). I had the awesome opportunity to design the 7x14 interior into whatever I needed for my gear. This is not a huge space and I also have to use it for my work equipment as I work from home. I had to get creative when it came to determining what was a priority for the space.
Here are my five top Tips and Must-haves for utilizing a small space for your craft.
Purge - I know this is not what any crafter wants to hear as we are notorious clutter-bugs. But it must happen. I guarantee you do not need all of the notions and fabric in the boxes you collect. Go through each piece and ask yourself
“Do I use this?”
“Will I ever use this?”
“Do I have other tools that complete the task just as efficiently”.
I bet you can get rid of a solid 25% of your things. Have a swap with your friends and trade for fabric you are more likely going to use. I give you permission to say goodbye to the fabric you don’t actually like.
Organization - I love to organize and spend more time cleaning my sewing room then actually sewing. Although it’s not the most cost effective, getting rid of the cardboard boxes, plastic bags, and dirty totes that currently store your supplies will be worth it in the end. Pull everything out of the boxes and organize like things together. Once you have your piles decide what style and size totes work best for your piles. The more you can stick with similar style and size totes the better. They will stack nicer and be easier to dig through when looking for a specific item. I would suggest going with clear totes so you always know what is in them. I am also a big fan of the label maker.
MUST HAVE TOTES
The Project Box - these are great ways to store projects in progress. It keeps all the pieces together and stacks beautifully with the other boxes. It is also great for Quilting Retreats so you can be confident all the fabric you need is in one place. Find them here
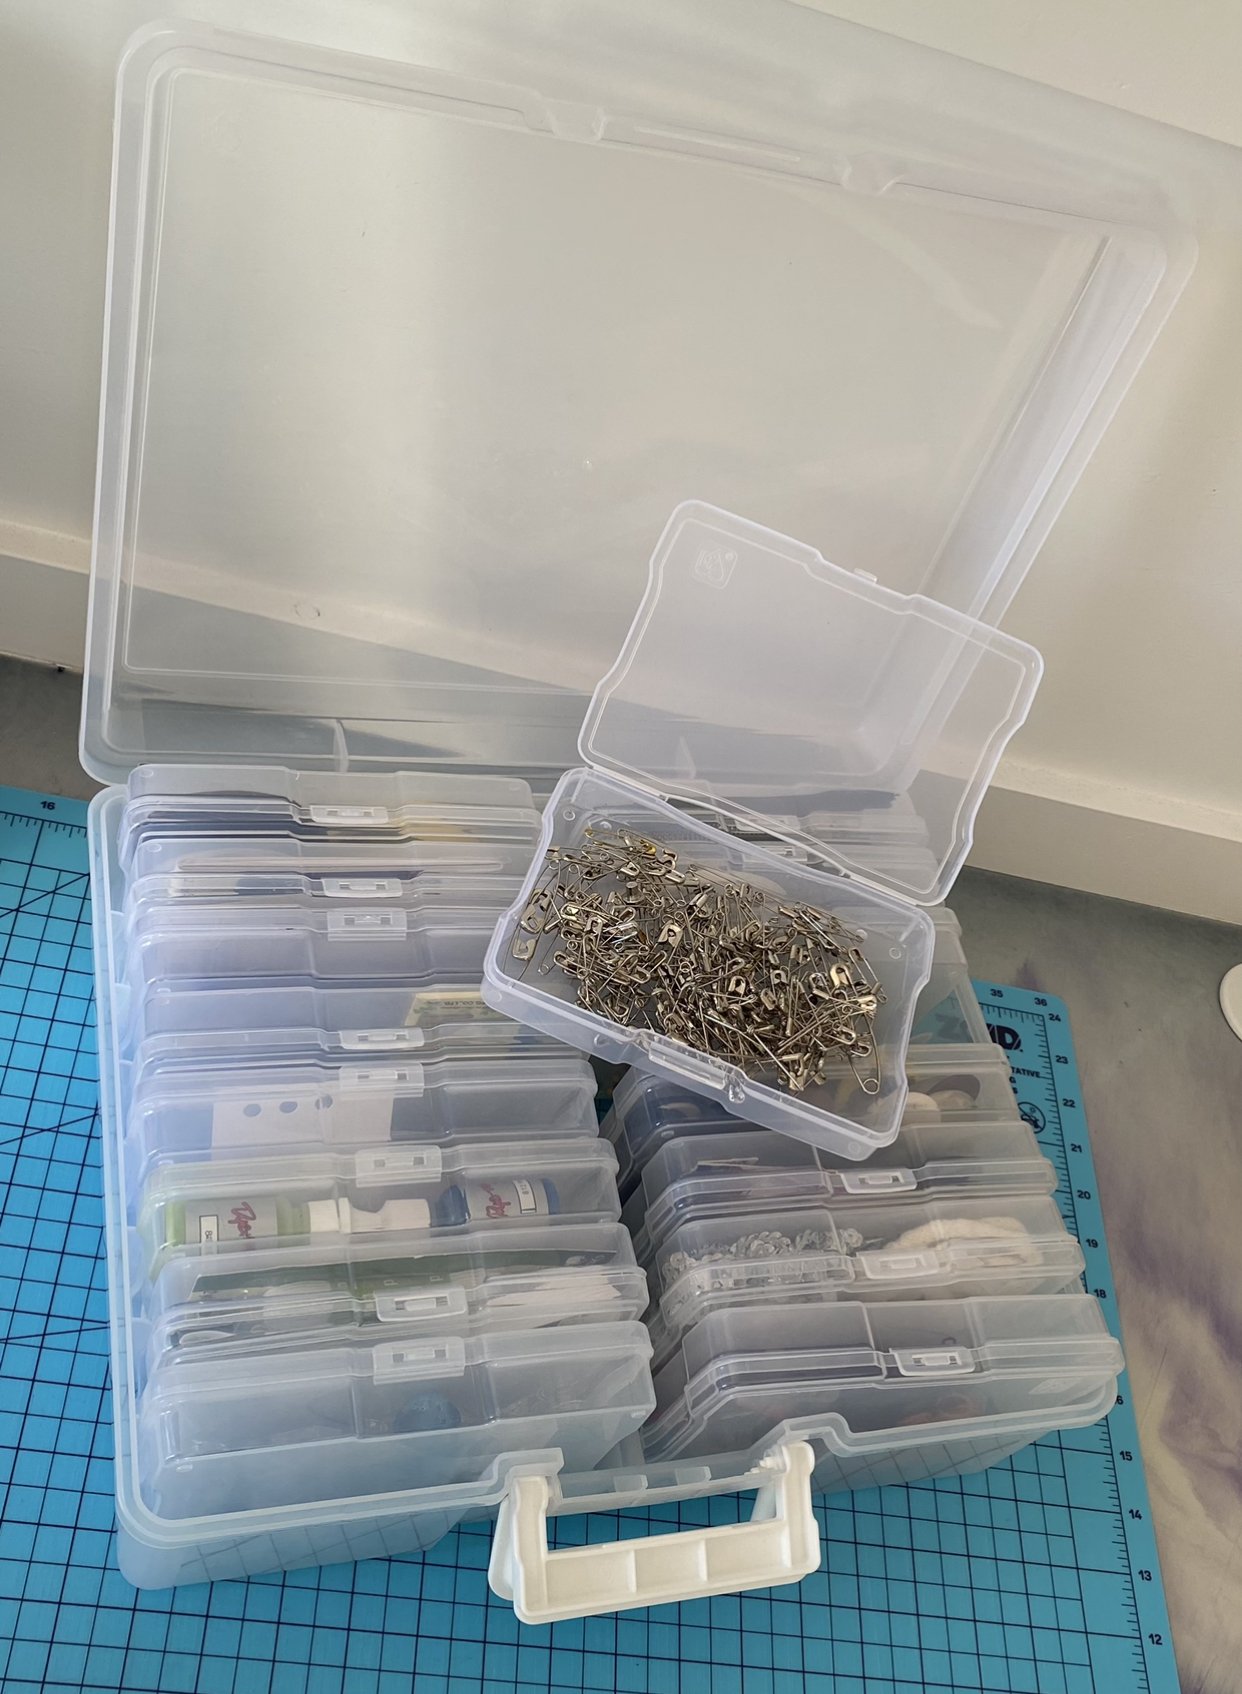
The Photo Storage Tote - surprisingly enough this tote is not made for quilting notions but I have been using it for years to store all my small supplies. It holds 16 small totes within that can separate small items like safety pins, buttons, empty bobbins, etc. Find them here

3. Remove Items from the Desktop - the less items that our housed on your work surface the better. You need to have open spaces to cut fabric, layout blocks, and hold the yardage of the quilt as you shove it through the machine sewing that final boarder on. If you keep all of your scissors, rulers, rotary cutters, and pins on small real estate available you will constantly having to stop and move things around. Utilize desk drawers and hang as much as possible on the wall by your work space. Remember, it needs to be accessible or it’s going to end up living on the desk anyways.
4. Fabric Storage - rearranging my fabric is a bit of a hobby of mine. I want to see it all. At all times. My small scraps go in five large, color coded (naturally) under-the-bed totes. They are clear and stack beautifully together. Its very simple for me to grab whichever color I need and dig through the pieces. Anything bigger than a fat quarter, however, gets folded onto a magazine board. These boards are the standard size of a piece of paper and are made of a heavy card stock. They are used to stiffen a magazine or comic book for collectors. I think they work much nicer to store fabric. There are two advantages to using these. First, they fit perfectly on a standard bookshelf- easy storage. The second being that it makes it very easy to view all your fabric and flip through the pieces to find your desired print. Nothing prevents the use of a stash more than not being able to easily access the fabrics. Find the magazine boards here.

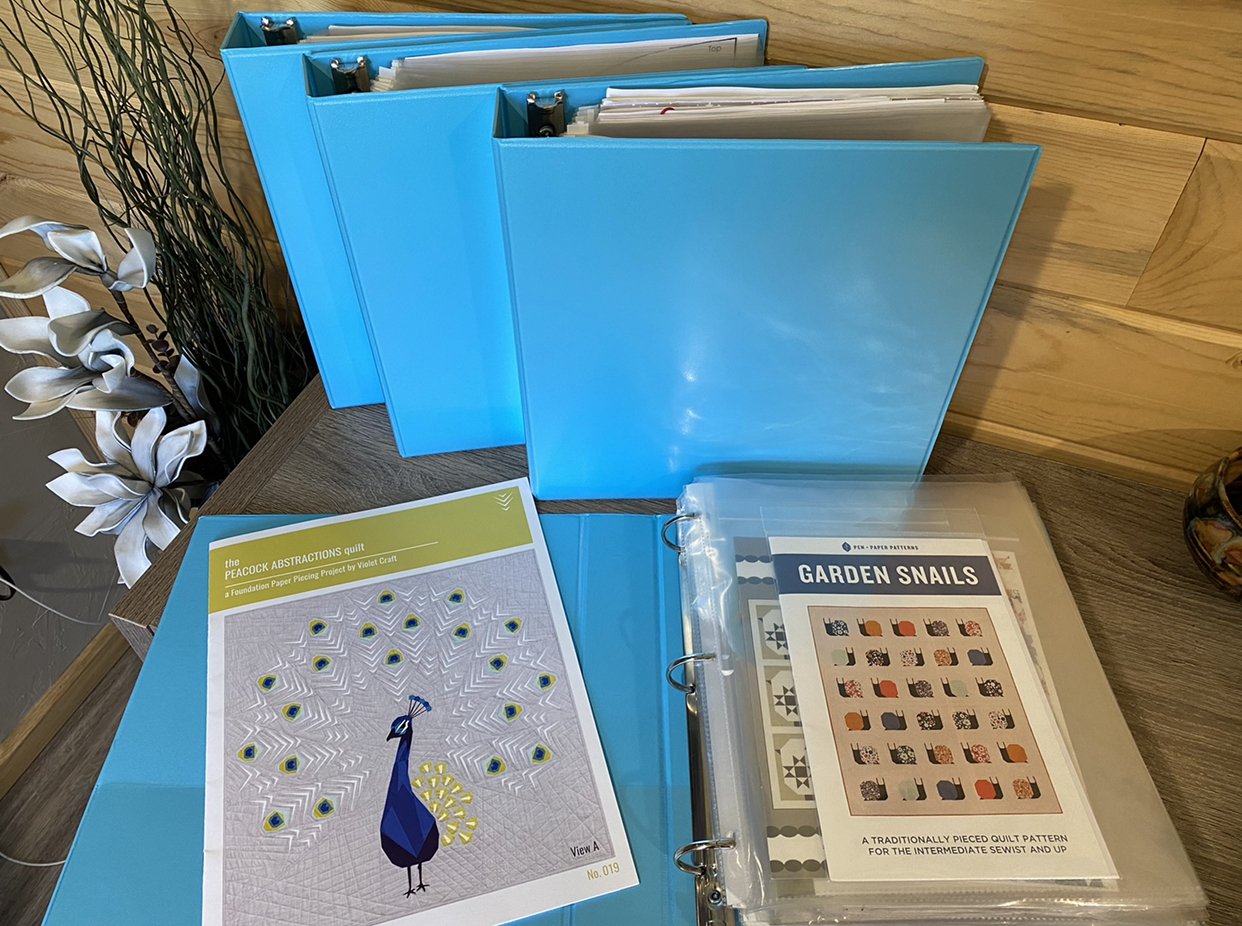
5. Pattern Storage - like everything else, you need to go through your patterns and clear out the ones you will not use again. Stop holding onto that pattern for the baby dress - your kids are grown and you hate to sew clothing. You need a clean organization for the remaining patterns. My choice of pattern organization is to keep them in binders with clear protective sheets. This makes the patterns easy to organize (personal preference by type of precut) and easy to flip through when you are ready for a new project. Binders will also sit easily on a standard bookshelf and take up little room.
Unfortunately, most of us will probably always have a smaller space than we would like. But this is no excuse not to quilt. Designate a space in your house, organize your supplies, and sew weekly.
Please tell me in the comments your favorite craft room hack or share your dream sewing space!
Here is a tour of my new Sewing Studio Shed